Making Native Plant Seed Balls with Kids
Using native plant seed balls is a great way to reseed the landscape while teaching kids the importance of native plants and the environment! A seed ball is a marble sized ball made of clay, earth and seeds which is used to replant areas where the natural flora has been destroyed. Some say it originated in Japan while others claim Greece, but the important thing is that the native plant seed ball has now been used around the world to reseed land that has been abused by man or neglected by Mother Nature herself.
Before the development of the native plant seed ball, reseeding some natural areas was difficult. The traditional method of broadcasting seed comes with several major drawbacks. The seed is sown on top of the soil where it may be baked dry by the sun, blown away by the wind, washed away by heavy rains, or nibbled away by birds or other small wildlife. Very little is left to germinate and grow.
Making seed balls addresses all of these problems. These clay balls protect the seed from the heat of the sun. They’re heavy enough to be unaffected by the wind or heavy rains and the hard clay casing deters animal nibblers as well.
In dry areas, the shape of the ball actually gives enough shade to conserve moisture. The seeds begin to germinate and the ball breaks apart. The small pile of crumbles provides the start for the root system, but is still heavy enough to anchor the emerging seeds to the ground.
How to Make Seed Balls
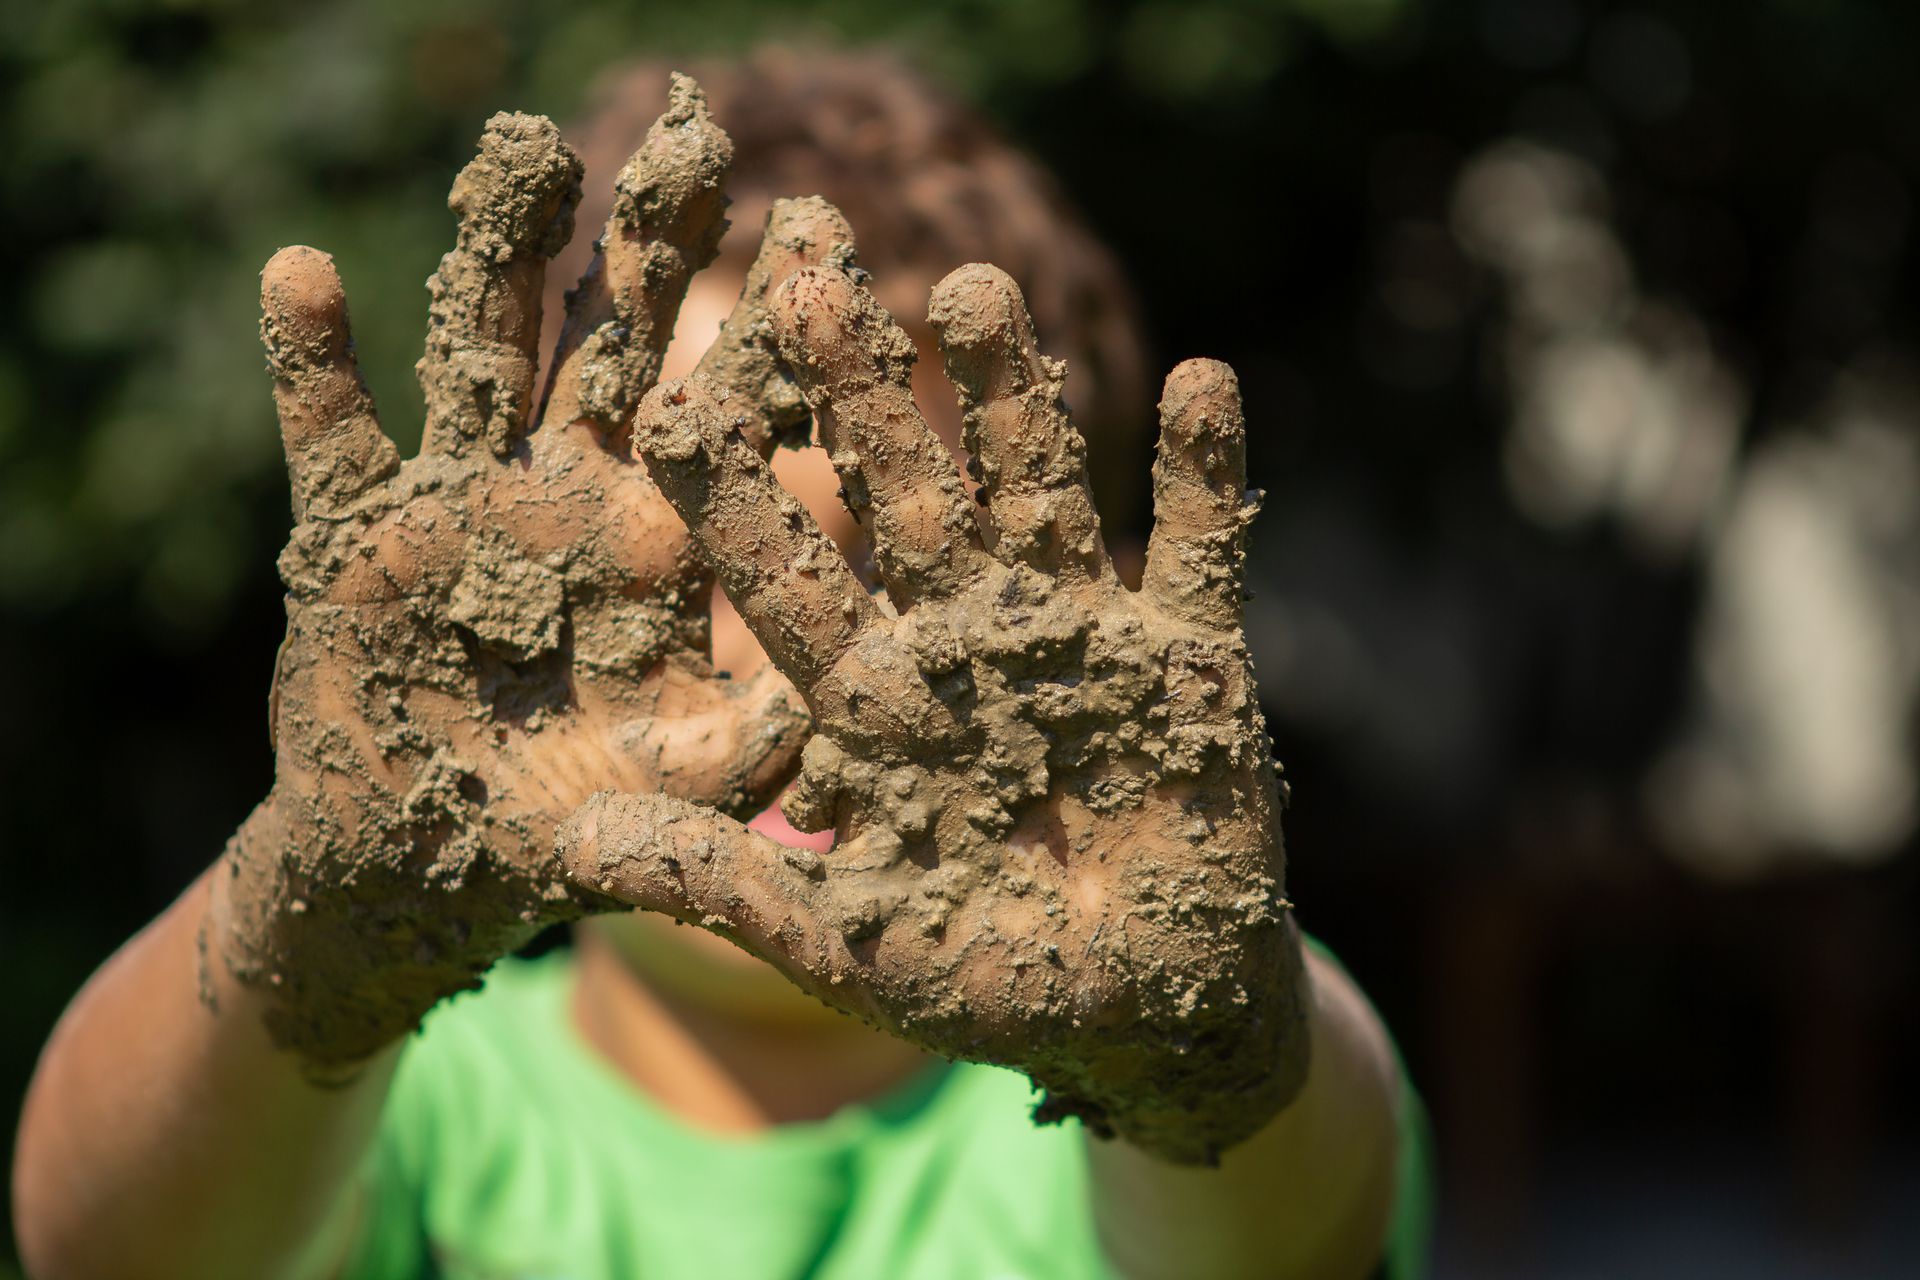
Learning how to make seed balls is a great activity for kids. It’s fun, easy to do and can be easily adapted to the environmental needs of the community. The seed ball recipe can be altered simply by changing the seeds.
How to make flower seed balls is no different than how to make a native plant seed ball. Change the seeds to bird seed and you’ve got the ingredients for a bird food garden in the suburbs. Turn a vacant city lot into a wonderland of grasses, cosmos and zinnias. Let your kid’s imaginations run wild.
Making seed balls is a terrific way to spend a rainy afternoon at the kitchen table or out in the garage. The seed ball recipe is easy to follow and, for older children, doesn’t require intense adult supervision. Why not gather the ingredients ahead of time so they’re ready for that rainy day?
Jackie Rhoades is a gardening enthusiast and contributing writer for gardeningknowhow.com.
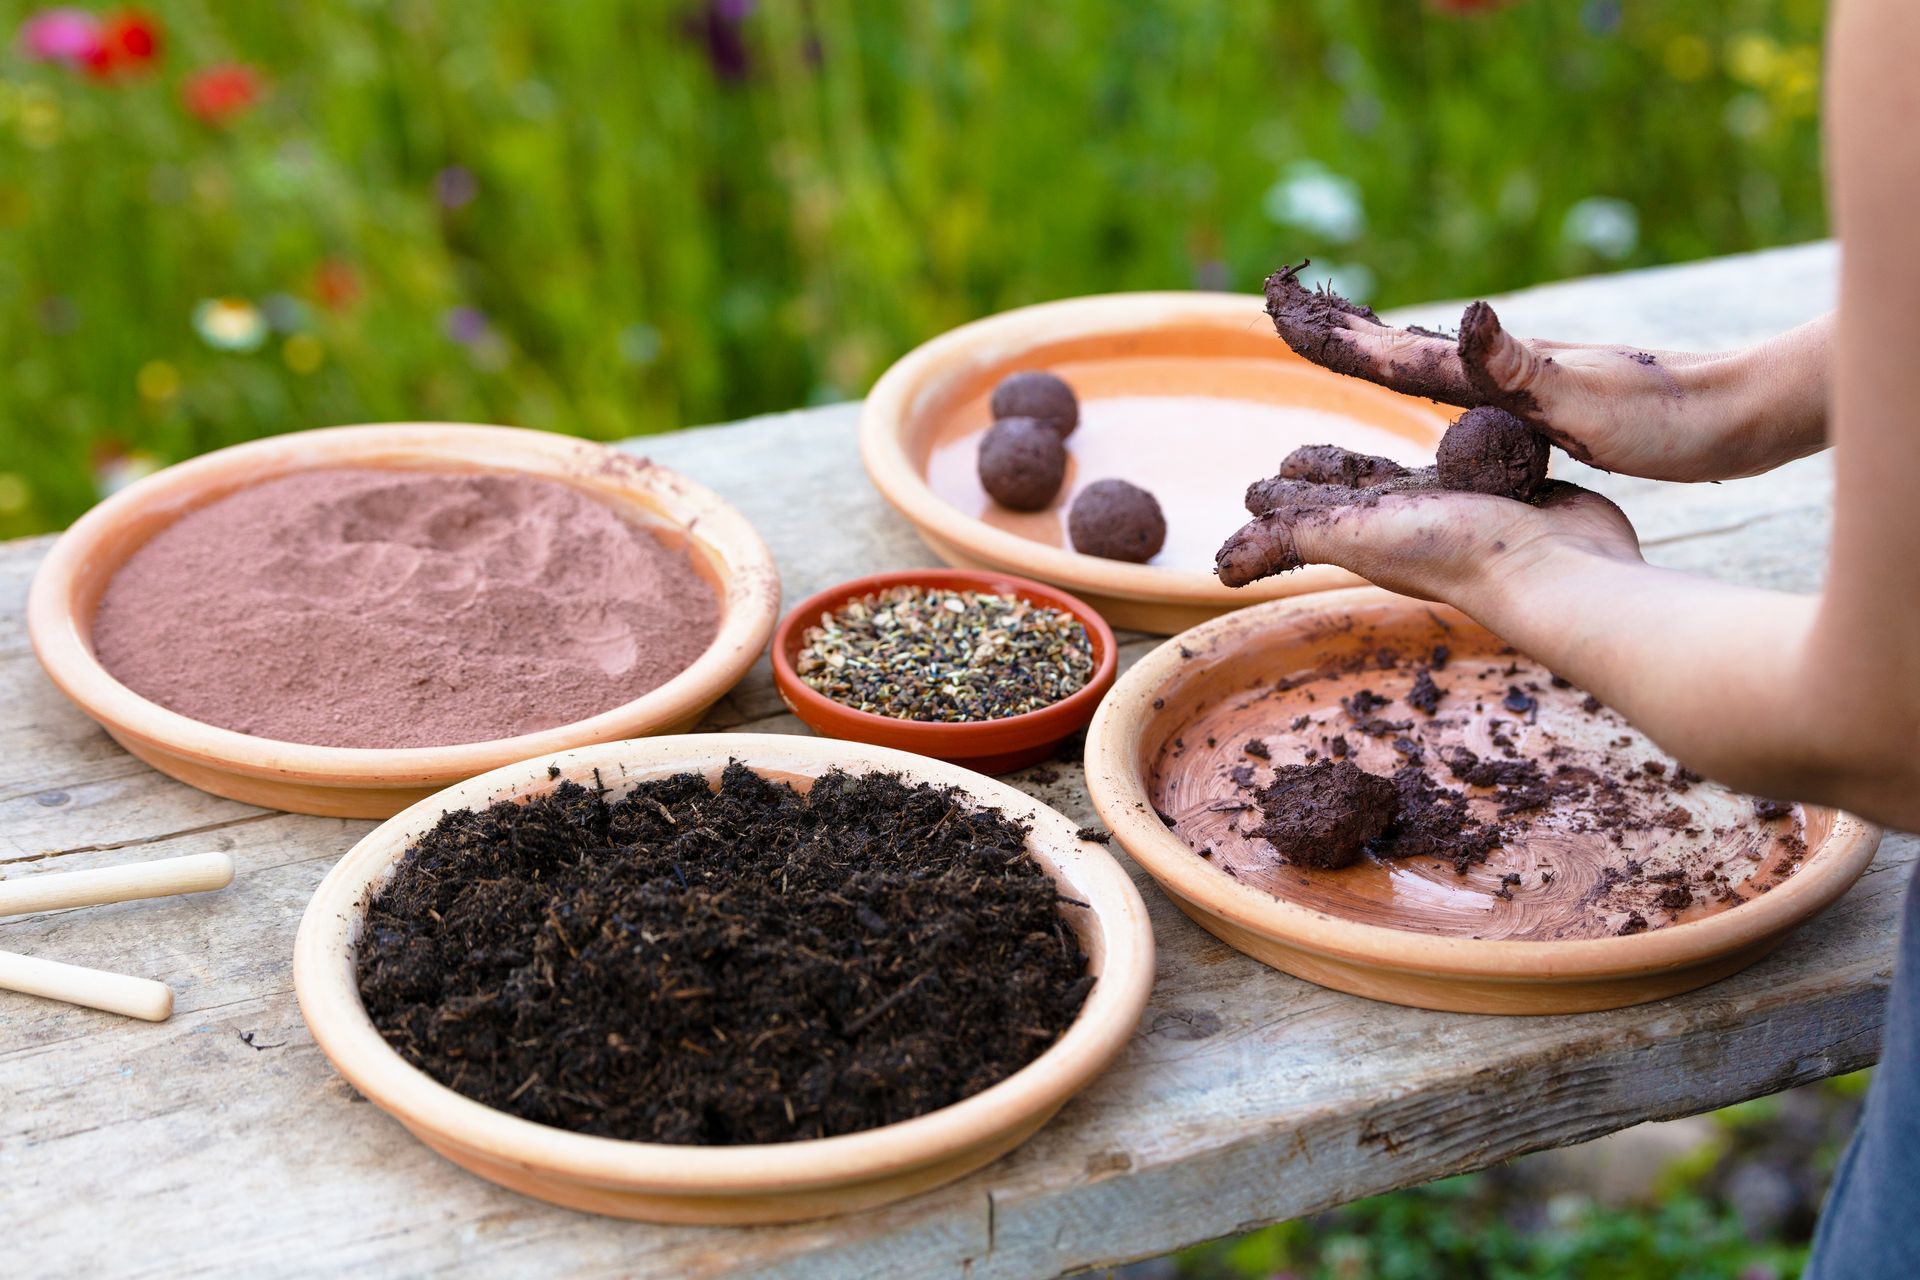
Seed Ball Recipe
- 2 parts potting soil (Black Gold™ Organic Potting Soil is available at Marlene’s!)
- 5 parts powdered pottery clay mix from your local art store
- 1-2 parts water
- 1-2 parts seeds of your choice (Botanical Interests Organic Seeds are an excellent choice and available at Marlene’s!)
Large tub to mix ingredients.
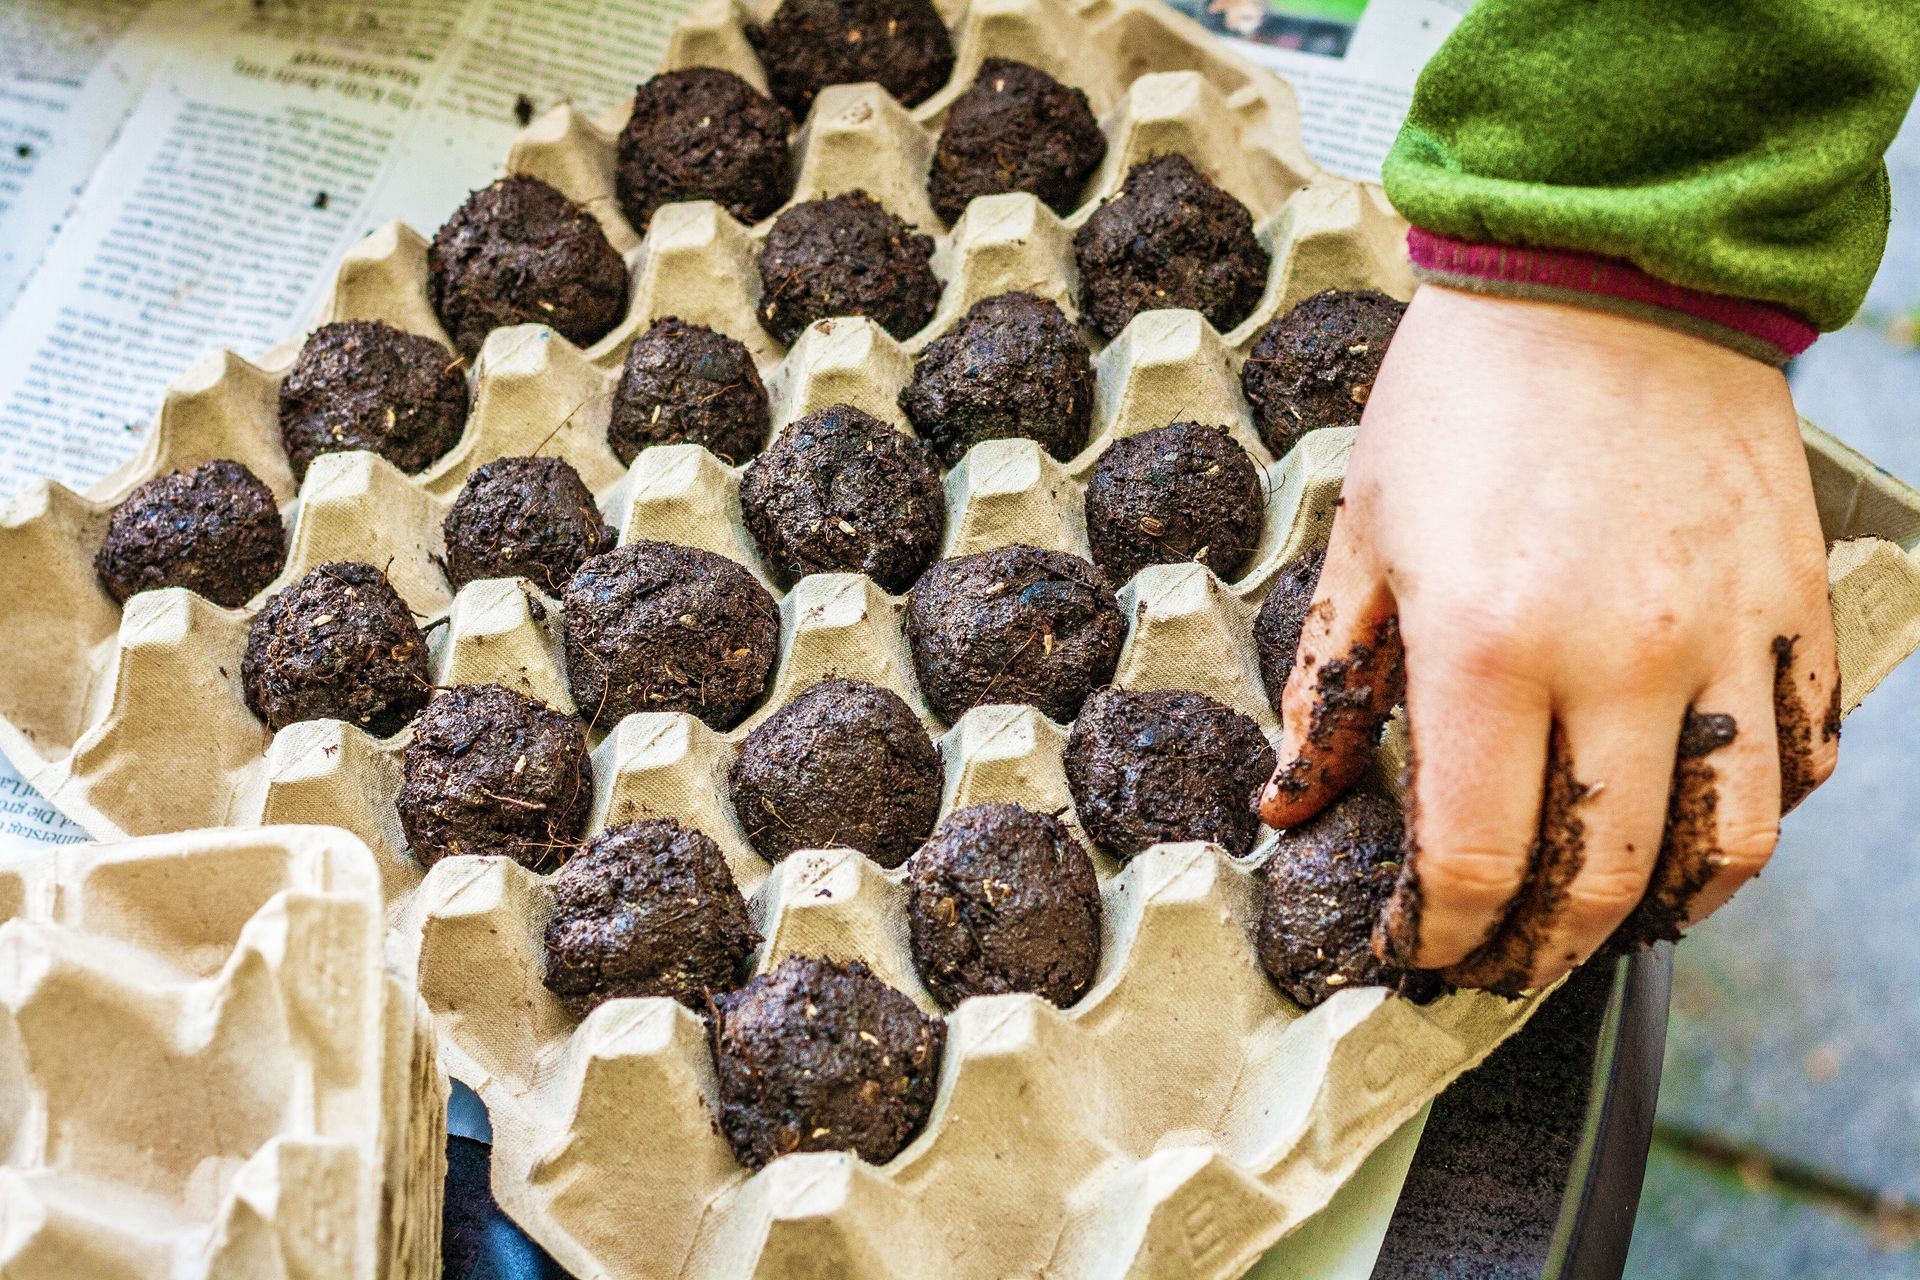
- Egg cartons or large box to dry and store seed balls.
- Mix the soil, clay and 1 part water thoroughly. There should be no lumps. Slowly add more water until the mixture is the consistency of soft cookie dough.
- Add seeds. Keep kneading the dough until the seeds are well mixed in. Add more water if necessary.
- Take small bits of the clay mixture and roll into balls about one inch in diameter. The balls should hold together easily. If they’re crumbly, add more water.
- Dry seed balls for 24-48 hours in a shady place before sowing or storing. They store best in a cardboard box. Do not use plastic bags.
- The last step in how to make flower seed balls is distributing them. You can place them carefully over the area to be planted or you can gently toss them one at a time, which is a lot more fun. Don’t bury them and don’t water them.
You’ve done your job, now sit back and leave the rest to Mother Nature!